
Learn How to Do Warrior 3 and Standing Splits With This Photo Tutorial

Warrior 3 and Standing Splits are similar balancing poses with a few nuanced differences that create the different asana expressions.
Both are strong and active poses that challenge balance, coordination, and focus. They rely on a bit of ease among all the effort to find stillness and room to breathe.
Both of these poses require us to stand on one leg, shift our center of gravity, engage our legs, core, and arms, lengthen through the side body, and keep safe alignment. All while trying not to fall on our faces. It’s no wonder these poses aren’t crowd favorites.
Learn Warrior 3 (And 30+ Other Key Yoga Poses!) In the Learning Yoga Series
Warrior 3, or Virabhadrasana C, is the third pose in the Warrior series. This is a standing balancing pose featured in the Learning Yoga program on YA Classes. Learn this foundational pose and 30+ others in this comprehensive workshop-style program. Not yet a YA Classes member? Try it out for free for 14 days.
What’s the Difference Between Warrior 3 and Standing Splits?
The main differences between these two poses is the tilt of the chest and height of the lifted leg.
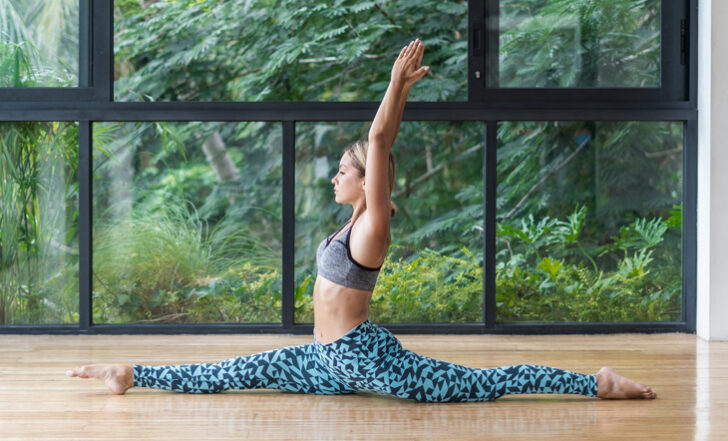
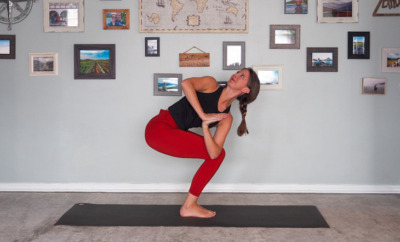
In Warrior 3, think of making a “T” shape with your body, with your chest and leg horizontal and parallel to the ground.
In Standing Splits pull your chest down toward your standing leg and let your lifted leg float higher into the air, moving into more of an inverted position.
Here’s Your Step-by-Step Guide to Practice Warrior 3 (Virabhadrasana 3):

Ready to try this challenging pose? Here’s how:
1. Prepare Your Shape
Start by creating the shape in your body.
Let’s try it:
- Find Crescent Lunge on your right leg
- Lean forward and shift your weight into your right leg
- When you feel steady, press your left leg off the ground and shift forward until your chest and left leg come parallel to the ground
- Make a “T” shape with your body, finding the same plane with your chest and leg
Looking for more yoga tutorials and yoga tips? Check out our full library of Yoga articles here
2. Refine Your Alignment
Polish your alignment to find balance and ease in Warrior 3.
Let’s try it:
- Check the alignment of your hips, you’ll likely need to drop your left hip so that it’s level with your right
- Slightly internally rotate your left leg by lifting the inseam of the leg toward the sky to help you level your hips
- Think of keeping your left thigh bone plugged into your left hip socket
- Keep the crown of your head in line with your spine
- Gaze at the ground
3. Engage
Activate strongly to stabilize your pose.
Let’s try it:
- Flex your left foot and press through your heel
- Support the pose by engaging your whole core: abdominals, glutes, and back
- Lengthen from the heel of your left foot, through your side body, and all the way to the tips of your fingers – you can think of reaching toward the horizon
4. Position Your Arms
There are several hand placement options including mudras for Warrior 3. So try a few and see what works best for you.
9 Powerful Mudras to Add to Your Yoga and Meditation Practice
Let’s try it:
- Traditional arm placement has arms outstretched long in front of you in line with your ears, with your palms facing each other
- You could also bring your hands to blocks on the ground directly under your shoulders for support
- Or press your hands into a wall or chair in front of you to help with balance and support
- Or fly your arms wide to the side and parallel to the ground for Airplane Pose
- Or bring your hands to prayer at heart center, finding Anjali Mudra (Prayer Mudra)
- Or extend your arms long in front of you, interlace all fingers except for your pointer finger and thumb, taking Kali Mudra (Power Mudra)
Here’s Your Step-by-Step Guide for Standing Splits (Urdhva Prasarita Eka Padasana):

Ready to jump into your next challenging pose? Let’s go!
1. Prepare Your Shape
Start by creating the shape in your body.
Let’s try it:
- From Warrior 3, bring your hands to the ground and walk them in toward your standing leg
- Pull your chest in tight toward your right quad
2. Refine Your Alignment
Polish your alignment to find balance and ease in Standing Splits.
Let’s try it:
- Maintain length in your spine and keep your shoulders active to avoid crunching or rounding along your spine
- Allow your left leg to float up toward the sky, lifting from your inner thigh
- As you lift your leg higher into the air, your left hip will naturally open some, but counter this with a bit of internal rotation of your leg in your hip socket
- Focus more on your standing leg than your lifted leg – a strong, supportive foundation will help your floating leg to lift with more ease
- Avoid opening your hip wide in order to lift your leg higher into the air – height will come with practice and patience
- Gaze toward your left shin
3. Engage
Activate strongly to stabilize your pose.
Let’s try it:
- Work to keep your hips neutral-ish
- Point or flex you lifted foot
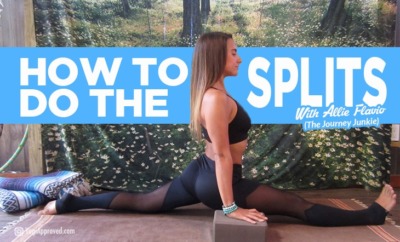
Working on full splits as well? Practice These 9 Yoga Poses to Help You Get Into Full Splits
4. Position Your Arms
There are a few hand placement options for Standing Splits. So try a few and see what works best for you.
Let’s try it:
- Your hands may stay planted on the ground
- Or, for an extra challenge, grab your left ankle with one or both hands
Use These 6 Helpful Tips to Find Balance in Both Warrior 3 and Standing Splits:
If you’re struggling in these poses, apply these simple tips to gain balance and control.
1. Build From the Ground Up
Start by building these poses from the ground up. Press firmly into the ground through the ball mound and heel of your feet, then lift up gently through the arches of your feet and your inner ankles.
2. Be Aware
Be cognizant of your standing leg. Hyperextending is common and can potentially create injury, so keep your knee joint slightly soft. Put a microbend in your standing leg, and then use your quads to gently lift through your kneecap.
3. Start from Crescent Lunge
Rather than starting from Warrior I, start from a Crescent Lunge Pose. For most yogis, our hips are much more neutral in Crescent Lunge than Warrior 1, which helps us to find proper alignment before entering the poses.
4. Find Length
Think about finding length in both poses, rather than height.
5. Flex Your Floating Foot
This helps to keep your leg muscles active and tends to encourage your hip into better alignment, which leads to better balance.
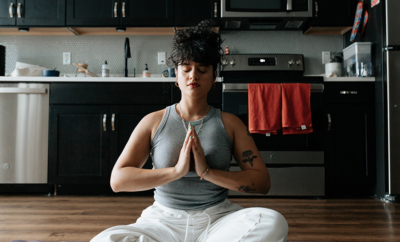
6. Find Your Breath
Breathing is what sustains you in any pose, yet it’s often the first thing we let go of when we encounter challenging poses like these. So don’t forget to utilize the power of your breath!
The benefits of nasal breathing go way beyond the yoga mat: Here are 4 Incredible Health Benefits of Nasal Breathing: You’ll Never Mouth Breathe Again!
The Takeaway on Warrior 3 and Standing Splits
Both Warrior 3 and Standing Splits have many benefits for the body and brain. They strengthen the legs, knees, ankles, back, shoulders, and core. They stretch the hamstrings, calves, and quadriceps.
Our balance, posture, stability, and coordination are challenged and improved with repeated practice.
Brain benefits of these poses include increased proprioception and attention. As we practice these, we learn where our body is in space. This helps with injury prevention as we age.
Lastly, the attention required to execute these poses helps to train our brains and improve overall concentration.
Although you may not jump for joy the next time you’re asked to do Warrior 3 or Standing Splits, you will be able to confidently do these poses with full body awareness and understanding of the pose details.
Ready to Find Balance in Warrior 3 and Standing Splits?
Practice Rooted Balance with Katy Scherer on YA Classes!
This article has been read 1K+ times. Feelin’ the love!
Don't Miss These


This Month's Letter
From the Editor
Monthly motivation and food for
thought from our founder.


Comments