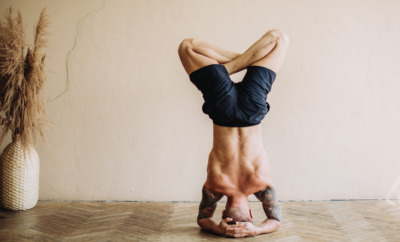
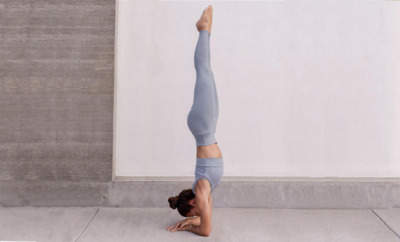
Defy Gravity: Practice These 7 Steps to Master Your Headstand Press Up (Photo Tutorial)

how to headstand
Oh, Headstand Pose. That one pose that we all love. Or at least love to hate. It embodies so much of what we think of when we think of “yoga.” Especially, when practiced as an advanced technique: the Headstand press up.
Power, grace, control . . . even a taste of magic. The illustrious Headstand press up seems nearly impossible.
But, it actually isn’t. It just takes a bit of technique and a clear understanding of the body to be able to float your feet up off the ground with effortless grace.
Want to Balance On Your Hands Instead?
If you love Headstand Pose or want an alternative to balancing on your head, try Handstand Fundamentals! This 30-minute YA Classes workshop-style class builds on some of the principles you learned in your Headstand Pose practice.
Advanced Headstand Pose: Practice These 7 Steps to Nail Your Headstand Press Up:
Find lift off in no time by following this step-by-step tutorial.
1. Find Your Crown
Before taking any variation of Headstand, it’s a wise idea to locate the crown of your head. Ideally, you want to base your inversions on the crown of your head so that you won’t excessively strain your neck by leaning your weight too far forward toward your forehead or too far back toward the base of your skull.

Let’s try it:
- Come to a kneeling position
- Take the crease of either one of your wrists to your third eye center (the space between your eyebrows)
- Palm your head with your hand
- Notice where your middle finger lands. This is a good approximation of where the crown of your head is
- Remember this spot on your head and use this as your base when you move toward Headstand
2. Create Your Base
After you’ve found the crown of your head, you can use it along with your arms to create a strong and stable base for your inversion.

Let’s try it:
- From kneeling, lean forward and release your elbows to the floor
- Take hold of opposite elbows and check that your elbows are shoulder-width apart
- Keep your elbows as they are, release your hands, and interlace your fingers. You can either choose to press the heels of your hands together for a more stable base or draw the heels of your hands apart to create a small “basket” with your hands to rest your head into
- Release the crown of your head (the same space you found in step one) between your forearms
Looking for more articles on Yoga, check out our full library of Yoga articles here
3. Stabilize Your Shoulders
Once you’ve created your base, you need to stabilize it to keep it strong and active as you start to lean the weight of your body into it.
Let’s try it:
- Actively press the floor away with your forearms
- Simultaneously, hug your upper arm bones in toward your shoulder sockets to keep them snugly integrated within the joint
- Without movement, energetically hug your elbows toward each other
- Keep all of these actions and, very subtly, broaden your chest
4. Hold Weight in Your Arms
After you’ve stabilized your shoulders to prepare them to bear weight, you can do just that: hold weight in your arms!

Let’s try it:
- From your stable base with your shoulders integrated and the crown of your head gently resting on the mat, tuck your toes underneath and lift your knees off the floor
- Send your hips skyward to create almost a Down Dog shape in your lower body (just with your forearms and head on the floor)
- You will immediately notice more weight being supported by your head. Counter this by pressing harder into your forearms, ideally placing about 80 percent of the weight in your arms and 20 percent or less in your head
5. Align Your Hips Over Your Shoulders
The secret to a Headstand press up is the alignment of your hips. In order to find lift off, you have to move and align this super heavy part of your body (essentially your whole pelvic girdle) to be able to feel a sense of lightness to float.
Bear in mind that in order to align your hips over your shoulders, you need pretty open hamstrings. Of course, you can always bend your knees to create the alignment instead. However, this will require more core work later on in the float up.

Let’s try it:
- From your Headstand prep shape with the crown of your head on the floor and your knees lifted, slowly tiptoe your feet closer toward your elbows
- Walk your feet as far forward as possible, ultimately working to align your hips directly over your shoulders
6. Counterbalance Your Weight
Now that you’ve created alignment between your torso and your hips, the real trick of the Headstand press up comes into play.
While floating up into Headstand of course requires strength in the arms and core, the real secret is actually in the counterbalance of weight. Similar to poses like Warrior III and Crow Pose that use counterbalance to balance your weight in the shapes, a Headstand press up uses the same techniques.

Let’s try it:
- From your bone-stacked Headstand prep position, draw in around your belly and walk your feet further forward toward your hands to lean the weight of your hips further forward past your shoulders
- Although it may seem strange to intentionally move yourself out of an “aligned” position (and it may feel a bit uneasy to move toward somersaulting over), this new alignment will allow your legs to become light
- Continue to lean your hips forward of your shoulders until your feet naturally lift from the floor – no hop required at all
If you need more core strength for that initial lift off, check out: Ready to Completely Transform Your Inversion Practice? Do These 12 Core Exercises
7. Find Lift Off in Advanced Headstand Pose!
Once you’ve set the stage, the last little bit of icing on the cake in the Headstand press up saga, is the actual lift off. At this point, after you’ve done all of the prep work, this float up should feel smooth, natural, and easy without requiring much effort at all!

Let’s try it:
- Once your feet have naturally become light and lifted from the floor because of the counterbalance of weight that you created by shifting your hips, activate your core strongly and press down firmly into your forearms
- Allow your legs to naturally float up toward the sky with little effort needed
- For an extra challenge, you may wish to pause halfway through your lift up (in a “pike position”), creating an upside-down “L” shape with your body. Stay for long enough and your core will certainly remind you tomorrow!
- When you’re ready, draw your legs all the way up to stack over your pelvis and your shoulders, creating one long line of energy in full Headstand and viola! You’ve successfully mastered your Headstand press up
Have Fun Playing With Your Headstand Press Up
If working these steps towards advanced Headstand Pose seems impossible, but you’re already rocking your Headstand Pose, you can always try the “negative” of a Headstand press up.
Work the same actions backwards by starting in full Headstand and slowly pike your legs down as you resist gravity. This will help you to find the musculature needed to work the inverse in a press up.
Also bear in mind that Rome wasn’t built in a day, so feel free to stay at any of the steps along the way and build strength there.
You can always move on to the next step tomorrow or next week or next year. There’s no rush when learning advanced Headstand pose, aka press up, or for any yoga pose for that matter. So, just enjoy the journey. Happy floating!
Next challenge: Learn Handstand with this 20-Minute Handstand Tutorial (Free Class)
This article has been read 2K+ times. Feelin’ the love!
You May Also Enjoy

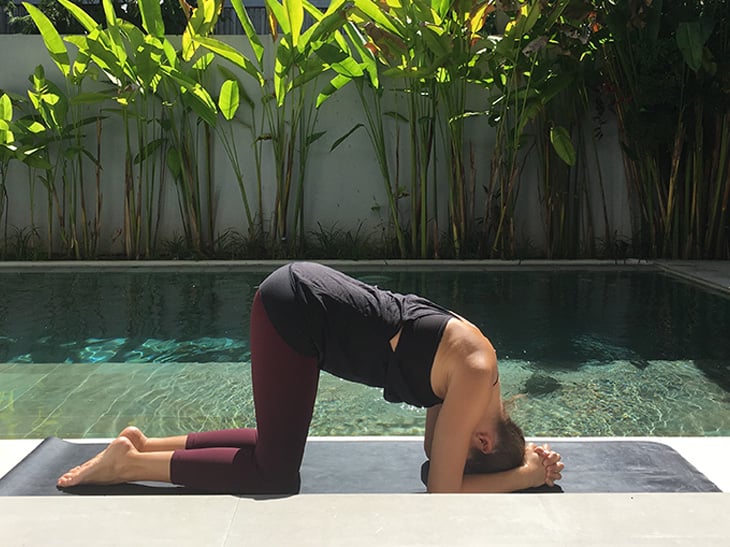
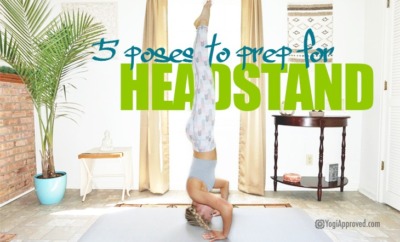
Headstand pose and other inversions require preparation, strength, and practice. Practice these 5 yoga poses to unlock your headstand pose.
Read »

Don't Miss These


This Month's Letter
From the Editor
Monthly motivation and food for
thought from our founder.