How to Make Your Own DIY Dreamcatcher (Step-by-Step Tutorial)
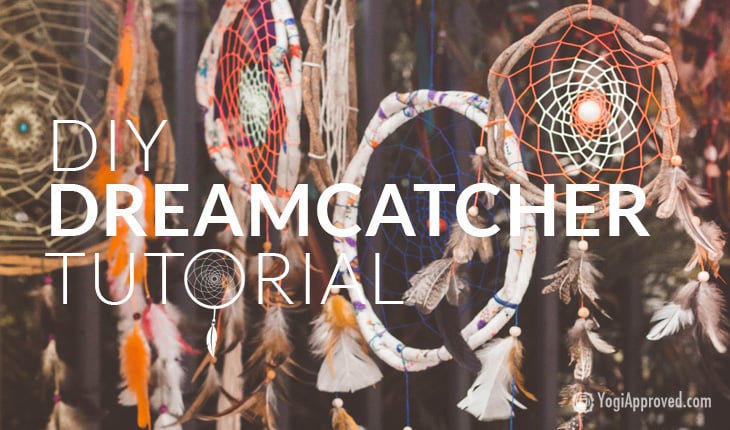
Like their name implies, dreamcatchers are believed to catch bad dreams in the webbing and allow good dreams to flow through. At dawn, the bad dreams are destroyed.
It seems like dreamcatchers are continuously gaining popularity. You see them adorning tank tops, strung from rearview mirrors, and of course – hanging in people’s houses. So why are dreamcatchers so popular these days?
Learn how to make a DIY dreamcatcher and add your own, unique flair to your good vibes.
Not only do dreamcatchers stop bad vibes in their tracks, they can be used as décor that is both unique and meaningful. They are beautiful to look at and keep good dreams and good vibes around while keeping bad vibes at bay.
Want to know how else you can cleanse your space? Read Cleansing Your Space: Everything You Need to Know About Smudging
Supplies Needed to Make Your DIY Dreamcatcher
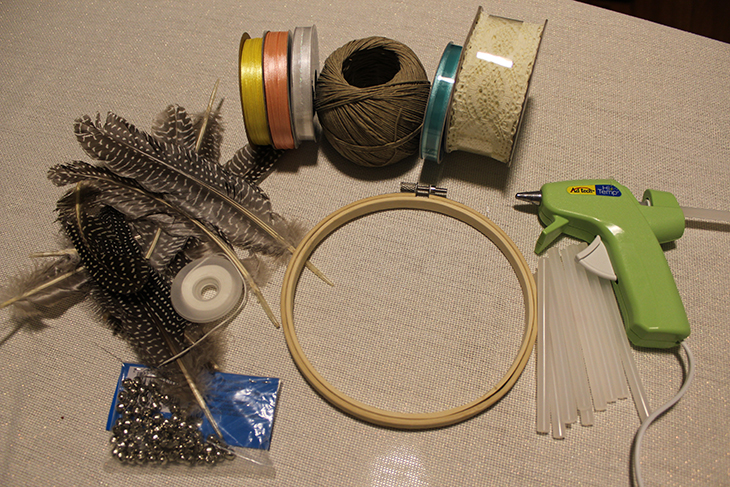
Supplies Needed:
- 6-inch bamboo hoop (Or a metal hoop)
- About 5 ft hemp cord
- Ribbon or leather cord
- Feathers (as many as you want!)
- String
- Bells and beads
- Hot glue gun & hot glue sticks
Note: All the items mentioned above can be found at your local craft store. When gathering supplies, remember: this is YOUR dream catcher, so choose colors and embellishments that will make you happy and keep the good vibes flowing.
How to Make Your DIY Dreamcatcher
Once you’ve gathered all your materials, carve out a few hours to have some serious DIY crafting fun! Follow the steps and photo tutorial below to make your very own dreamcatcher:
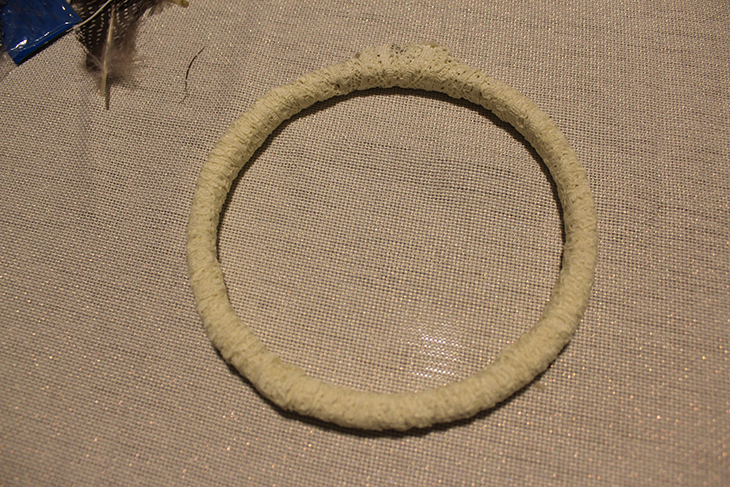
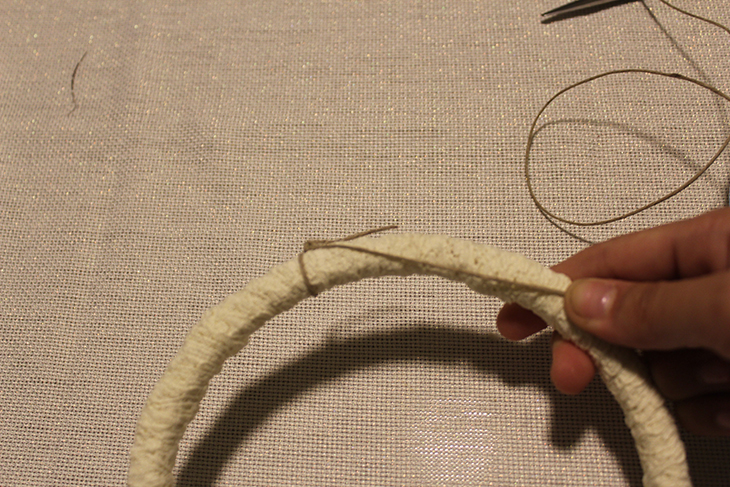
1. Wrapping the Hoop
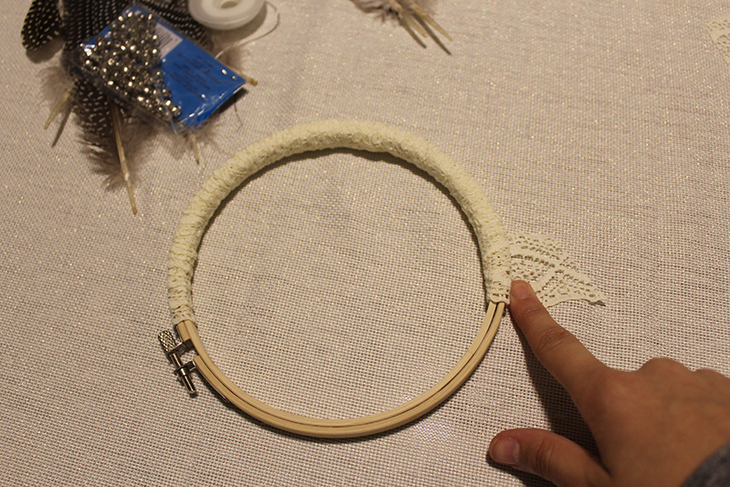
- Find a starting point and begin wrapping the hoop with your ribbon
- If you run out of ribbon, or you want to change color, add a tiny drop of hot glue and continue wrapping
- Finish wrapping the hoop by securing the ribbon’s end with a hot glue gun
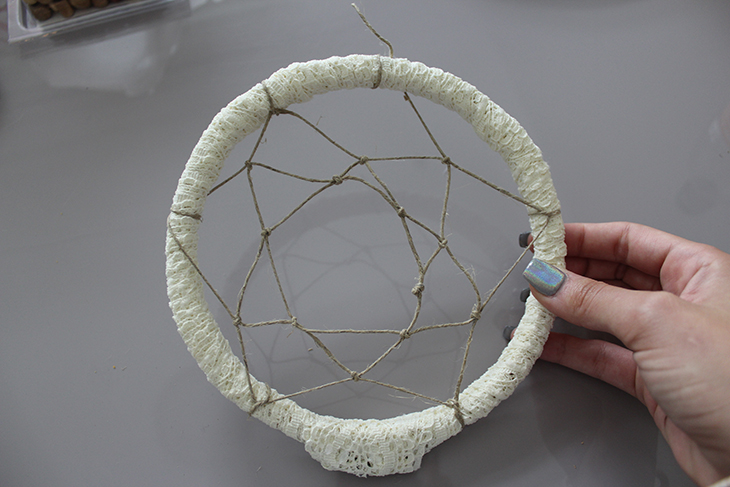
2. How to Weave the Dreamcatcher
- Decide where the top of the dreamcatcher will be and tie a secure knot with your hemp cord
- About a finger’s length away from the first knot, wrap the hemp cord underneath the hoop and loop it through
- Continue wrapping the hemp cord like this for the entire circumference of the hoop
- Tie the next knot on the hoop centered between the first two knots, so it will loop around the center of the first row of hemp cord. (Take your time, this part can be a bit confusing)
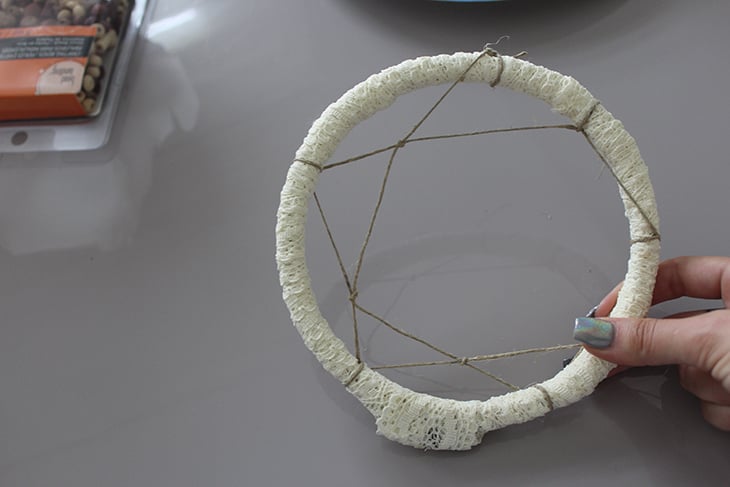
- Continue this knot pattern, slowly making the webbing smaller as you move towards the center of the hoop
- To finish the webbing, simply end on a knot where the webbing looks complete
- Make sure you pull the hemp cord tight, and double or triple tie the final knot. Trim the remaining hemp cord
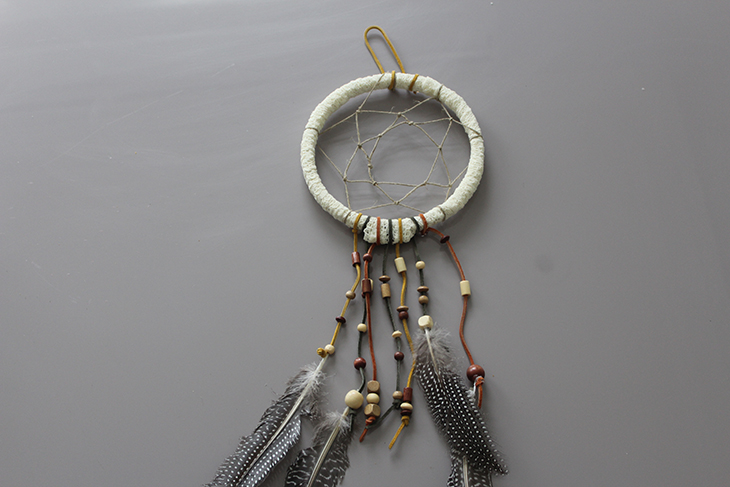
3. How to Decorate Your Dreamcatcher
- Cut your leather cord or ribbon to about 8 inches
- Take the leather cord and tie a knot at the bottom of the dream catcher. To keep the leather cord secure, place a tiny drop of hot glue on top of the knot

- String beads onto your cord or ribbon as desired and make a knot under the bead to keep it in place
- Pro Tip: Some cord will be wide enough you don’t need to knot it. If this is the case, use one knot under the last bead to be safe

4. Adding Flair
- Measure 2-3 feet of string
- Take two feathers and tie a knot about one inch from the end of each quill, wrap the string around each quill a few times, and leave a piece of string hanging out
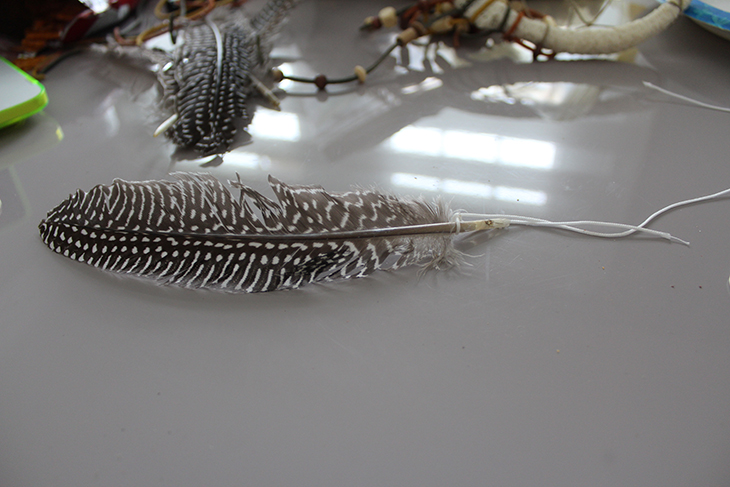
- String a bell or bead (or both!) onto the piece of thread string that is left over, tying a knot to secure the bell or bead in place
- Decide where you want the feather to hang on your dreamcatcher, then tie it and trim the extra string
- Keep adding as many feathers, beads, and bells as you want until your dreamcatcher is complete!
5. How to Hang Your Dreamcatcher
- Cut a piece of ribbon long enough to hang your dreamcatcher, and tie a knot at the top of the hoop
- Add a drop of hot glue to the knot, and then tie another knot (be mindful of the hot glue!)
- Trim the ends of the leather cord or ribbon
You Just Created Your Very Own DIY Dreamcatcher!
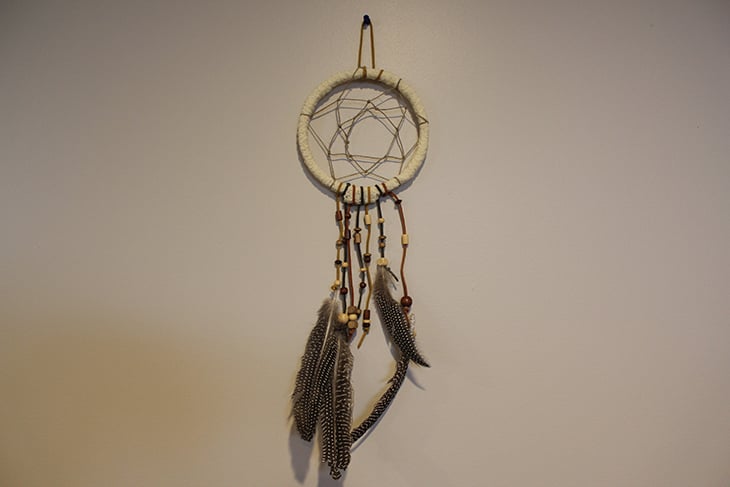
Congratulations!! You just created your very own dreamcatcher. It’s beautiful, it’s meaningful, and it’s uniquely y.o.u.
Now you get to find a special place to hang your beautiful creation. Where will you hang your DIY dreamcatcher to obliterate those bad vibes? Give yourself a pat on the back and enjoy the good vibes of your DIY dreamcatcher.
This article has been read 1K+ times. Feelin’ the love!
You May Also Enjoy

Regaining your personal power from negative energy can be made a little bit easier with these 5 suggestions. Take a breath, grab some tea and read this!
Read »

Don't Miss These


This Month's Letter
From the Editor
Monthly motivation and food for
thought from our founder.