How to Make a DIY Japa Mala Necklace + Charge It With Intention (Step-By-Step Photo Tutorial)

If you are a yogi or just spiritual AF, you’ve probably seen Japa mala necklaces . . . maybe you even own one. If you do, maybe you wear it as a fashion accessory or use it during meditation – and you probably paid a pretty price for it.
But, did you know that you can easily and affordably make your own Japa mala necklace, charged with your creativity, good vibes, and positive intentions?
Read on to learn how to make your own Japa mala!
What Is a Japa Mala Necklace?
Japa malas or malas are beautiful strands of 108 sacred beads that have been used in meditation for millennia by Hindus. And modern yogis are now finding empowerment and enlightenment in these sacred beads.
In Sanskrit, Japa mala literally translates to “prayer beads for spiritual practice.”
Hindus traditionally hold their malas in their right hand and slide their thumb across each bead to count each time a mantra is recited, for a total of 108 times. As a yogi, it was only a matter of time until I learned how to make my very own Japa mala.
Making your own DIY Japa mala necklace is a very meditative practice that can be just as healing as actually using the mala to recite mantras.
What Is the Significance of 108?
Ever wonder why mala necklaces have 108 beads?
The exact meaning of the number 108 is open to interpretation across cultures and disciplines, but there is no denying its significance. Look at where 108 shows up:
- In the ancient text of the Vedas, there are 108 Hindu Scriptures (or Upanishads)
- In Vedic Astrology, there are 12 zodiac houses and nine planets – when multiplied the total is 108
- There are 108 Qi energy lines (or meridians) within the body
- In numerology, the number 1 stands for God, 0 is the wholeness of spirit found through enlightenment or non-attachment, and 8 represents infinity
Interested in learning more about 108 as it relates to our yoga practice? Read: The Meaning of 108 Sun Salutations + What Practicing Them Will Teach You
DIY Japa Mala Necklace Materials:
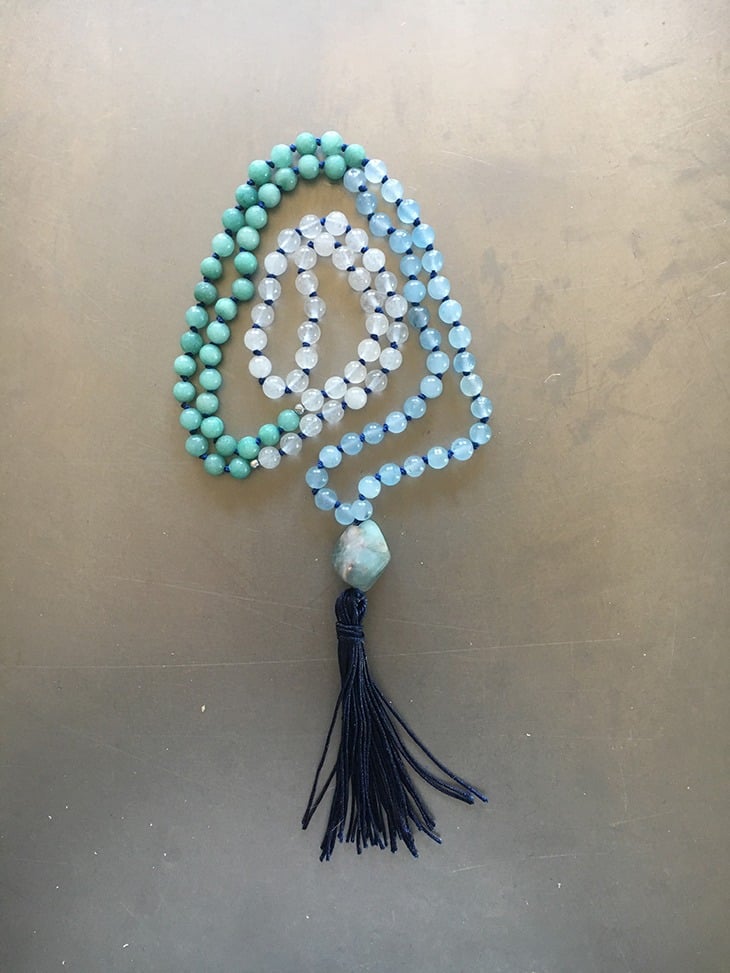
Mala beads are made from many different materials – stone, wood, bone, or seeds from the Rudraksha tree. Japa mala necklaces are traditionally strung on a hand-knotted cord with 108 beads, plus a guru bead (the anchor at the center of the mala, above the tassel), and a tassel.
To choose the beads, it may be best to go to a bead store and let the energy of the beads speak to you. You can also find most of these items in a bead store, so it’s a good option for a one-stop-shop.
- Beadsmith or a board to lay out your beads and accessories (optional)
- Jewelry tweezers or pliers (they should have a sharp point)
- Bead cord (I like to use the ones with the needle already attached for easy stringing)
- Yarn or fabric cord to make the tassel (or you can find individual pre-made tassles)
- Jeweler’s glue or crazy glue
- 1 medium-sized stone or 12mm bead for the guru bead
- 108 6-8mm beads
- Additional options – charms or accent beads
How to Choose Beads for Your DIY Japa Mala Necklace Based on Their Energetic Properties
Crystals and gemstones carry different frequencies of vibration, giving them specific properties that help you heal, amplify your energy, and even invite love into your life. You can choose a crystal based on its healing properties, color, or just simply because it calls to you.
Here are a few ideas to start with:
Healing: Apache Tears, Amethyst, Obsidian
Grounding: Agate, Jasper, Smoky Quartz
Calming: Blue Lace Agate, Blue Calcite, Aquamarine
Love: Emerald, Rose Quartz, Chrysoprase
Abundance or Luck: Jade, Aventurine, Citrine
Happiness: Ocean Jasper, Peridot, Carnelian
Intuition: Apatite, Lapis Lazuli, Moonstone, Sodalite
Clarity: Clear quartz, Calcite, Hematite, Azurite
Traditionally, Japa mala necklaces were never to touch the ground as that was believed to be a sign of disrespect. And when not in use, they were to be placed in a pouch, away from the elements.
Malas (and crystals alike) are believed to carry the energy of the individual who wears them, so they are not be handled or touched by anyone else, as to not absorb their energy.
How to Choose Beads for Your Japa Mala Based on Your Astrological Sign
In Hinduism, Vedic Astrology plays a major role in daily life. By choosing beads based on your astrological sign, you can support and strengthen the characteristics that your sign embodies.
Find the stones for your sign below:
Aries: Agate, Aquamarine, Aventurine, Dolomite, Jade, Tourmaline
Taurus: Emerald, Malachite, Amber, Angel Wing Agate, Chrysanthemum stone
Gemini: Agate, Apatite, Citrine, Emerald, Natural glass
Cancer: Bornite (Peacock Rock), Citrine, Moonstone, Ruby
Leo: Carnelian, Onyx, Golden Topaz, Sunstone
Virgo: Malachite, Unakite, Calcite, Cluster Quartz
Libra: Gold Rutilated Quartz, Fire Opal, Fire Agate, Flourite
Scorpio: Smoky quartz, Topaz, Amethyst, Sodalite
Sagittarius: Blue topaz, Turquoise, Lapis Lazuli, Tourmaline
Capricorn: Agate, Tiger’s Eye, Smoky Quartz, Black Tourmaline
Aquarius: Garnet, Hematite, Amethyst, Rainforest Jasper
Pisces: Aquamarine, Bloodstone, Blue Lace Agate, Lapis Lazuli
Follow This Step-by-Step DIY Guide to Create Your Japa Mala Necklace, Charged With Intention:
Stay open in the creative process and follow your intuition. Creativity flows best when you do not overthink the process. Before you begin, set an intention for your mala so that whenever you wear it, you can channel and manifest your specific intention.
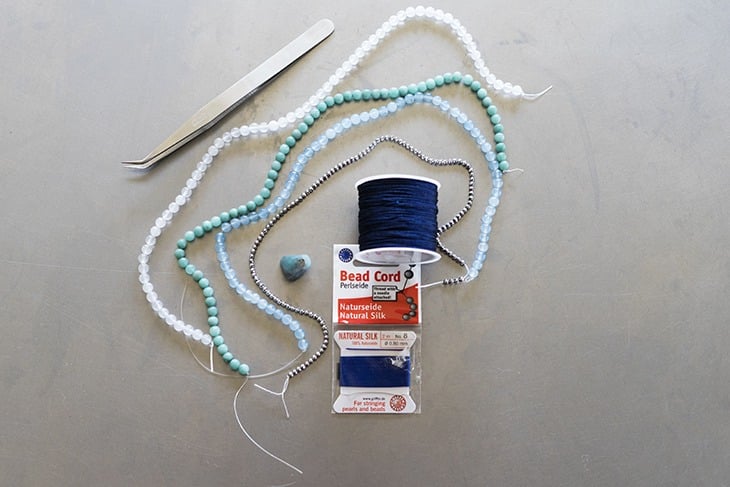
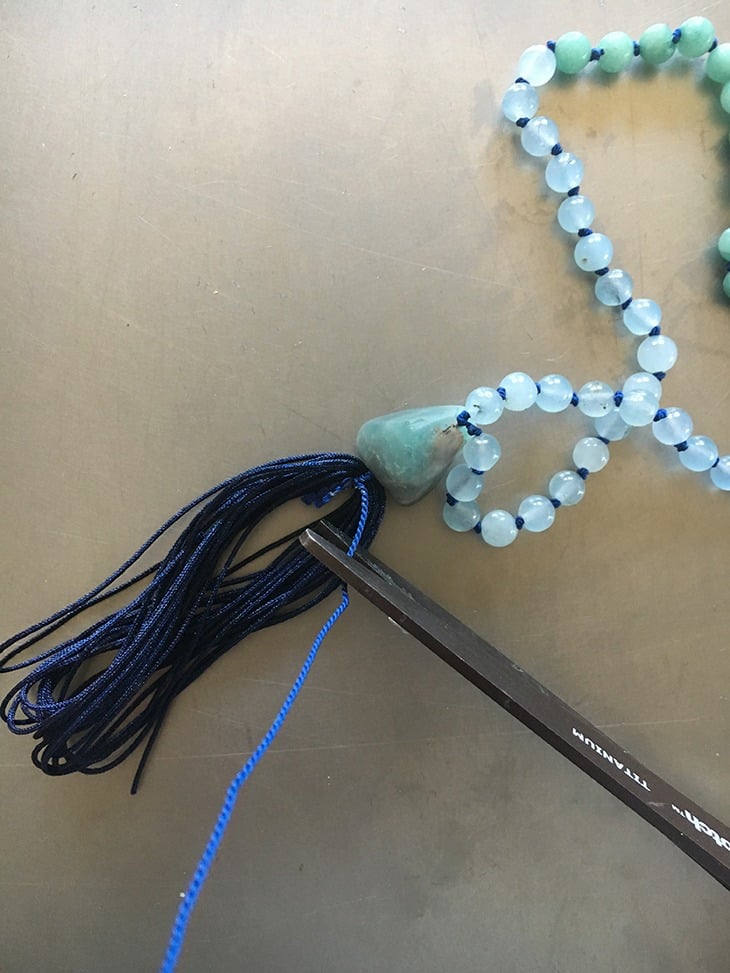
1. Gather All Your Japa Mala Materials
On a flat and clean surface, prepare your 108 beads for stringing. If you are using a variety of beads, you may want to lay them in the order you want to string them.
Note: This is where the beadsmith board is helpful.
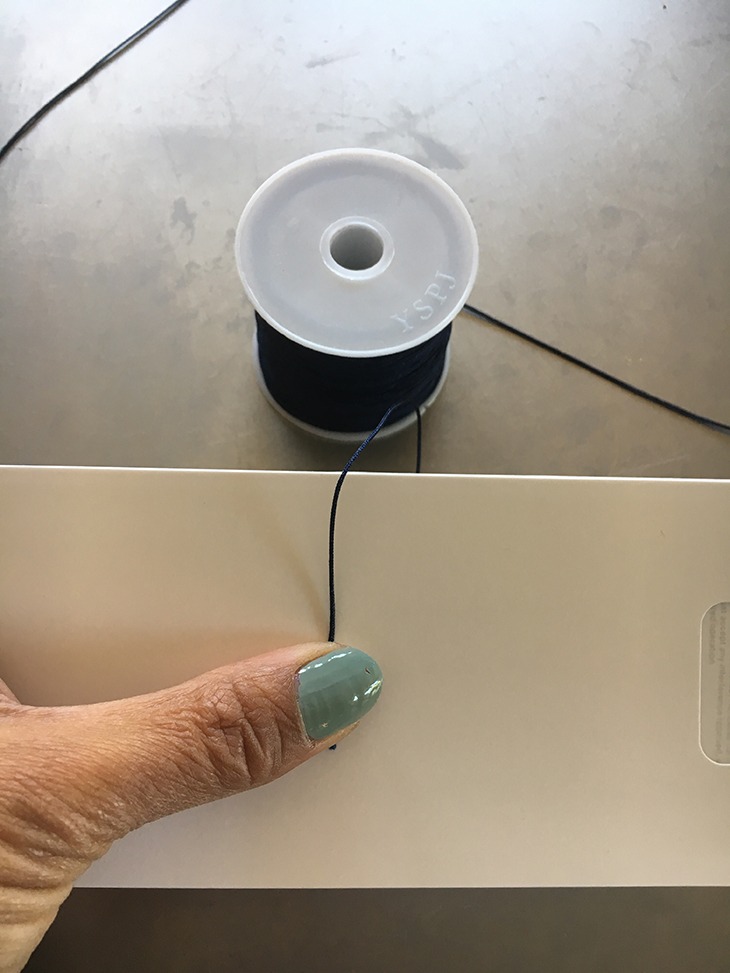
2. Tie the End Knot
Take your bead cord and measure a 2-inch segment from the end, without the needle. Tie a large knot at this 2-inch mark, leaving the extra bit of cord at the end. This will be the starting point for your mala and you will need the extra 2 inches of cord to tie the guru bead and tassel.
Note: You will place the guru bead under this knot. Make sure you are organizing your beads in the correct order, starting from here.
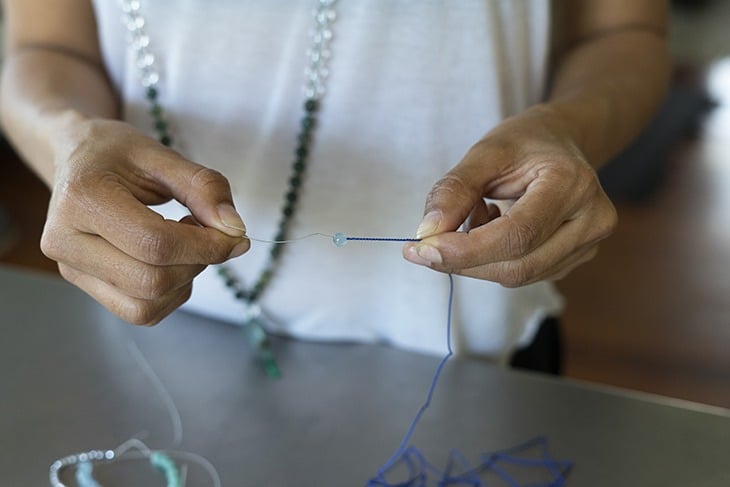
3. Thread the First Bead
Taking the end with the needle, thread your first bead onto the cord, and push it all the way to the end with the knot. It should be pressed firmly against the end knot.
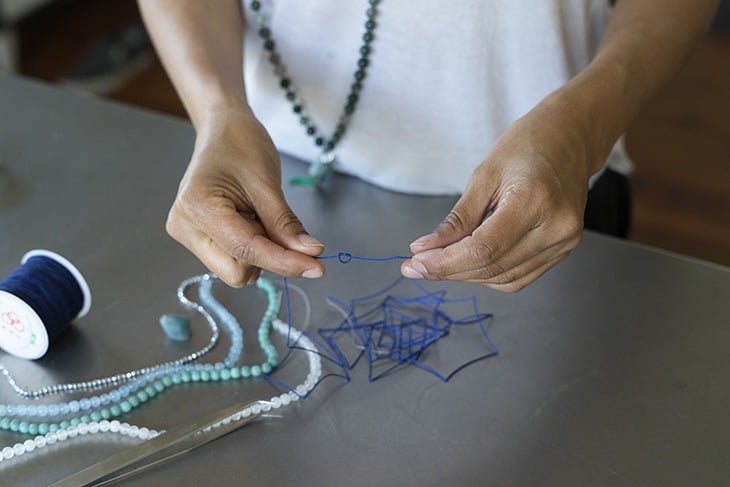
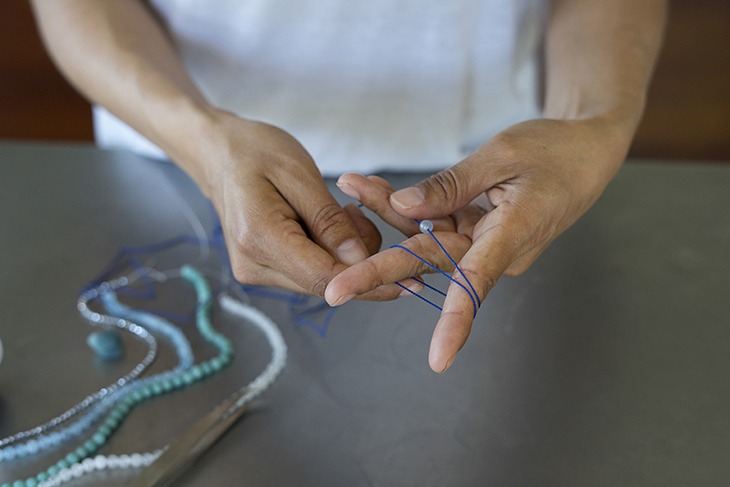
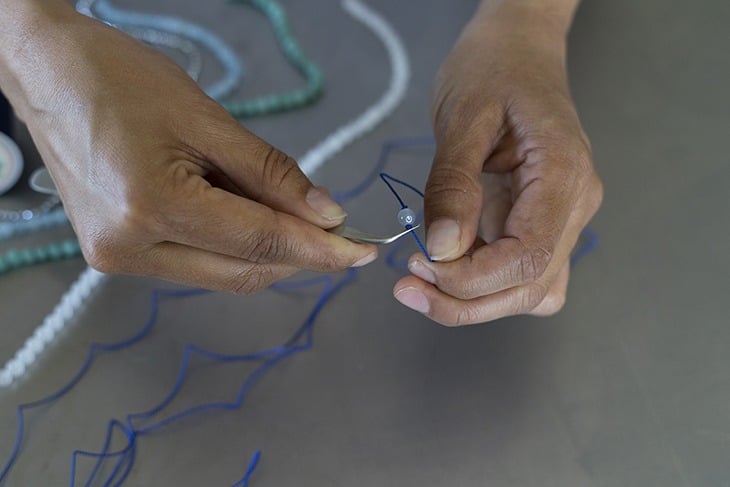
4. Add a Knot
Extend your index and middle finger (use your less dominant hand for this step). Wrap the cord around these two fingers twice. You can hold the cord in place with your thumb.
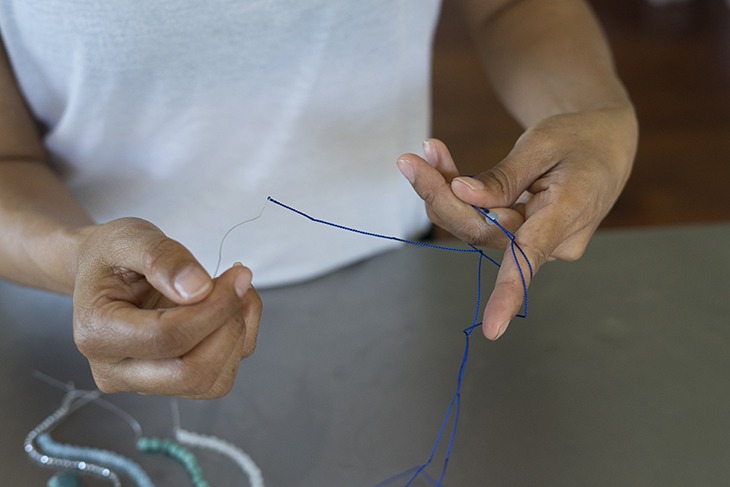
Take the needle end of the cord and slide it into the loop, sliding it behind your fingers/hand. Grab your tweezer/plier with your dominant hand.
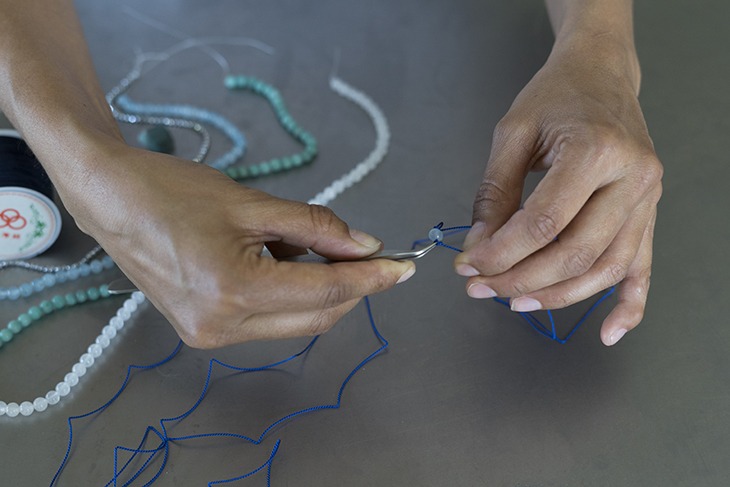
Next, pull the cord taut, until a knot starts to form toward the top of the bead. Try to get the knot as close to the top as you can. Then use the tweezer/plier to slide the knot down so that it tightens snug against the bead.
5. Add Beads + Charge Your Japa Mala
Continue the process of adding a bead then tying a knot. Remember, the knot should fit snugly against each bead.
Channel the energy of your intention as you go – chant a mantra or bring your intention to mind with each knot you tie. This process can take anywhere from a couple hours to a couple weeks. Take your time and enjoy the creative process!
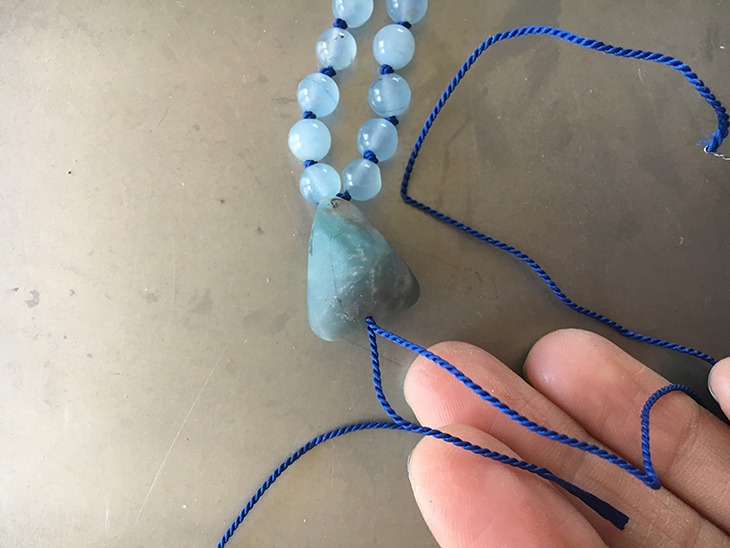
6. Add the Guru Bead
Take your guru bead and insert both ends of the thread into the hole in the bead. Once threaded through the bead, tie the ends into a knot. Then tie a second knot.
Tying it twice symbolizes the complementary nature of masculine and feminine energies. This will also firmly secure the bead in place. Leave the two strands hanging for now – we will use these in the next step for the tassel.
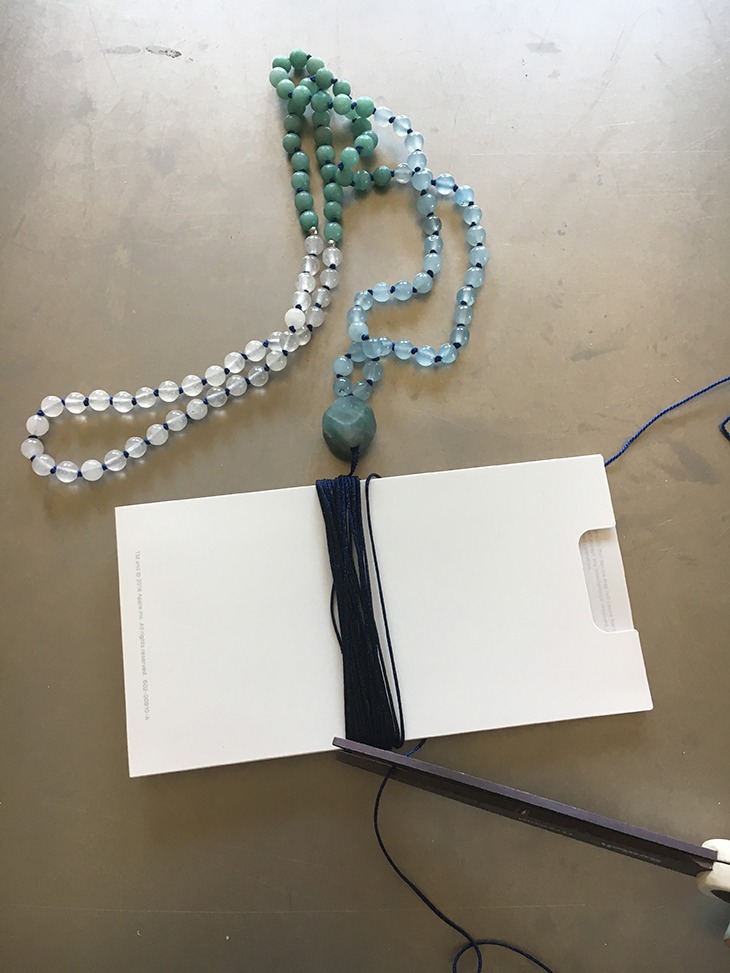
7. Make the Tassel
Take a 3×5 inch card (a credit card or a piece of stiff cardboard is perfect) and start wrapping the yarn or cord around the card. The amount of times you wrap the cord is up to you. The more you wrap, the thicker the tassel will be. In this example, I wrapped it around the card about 25 times.
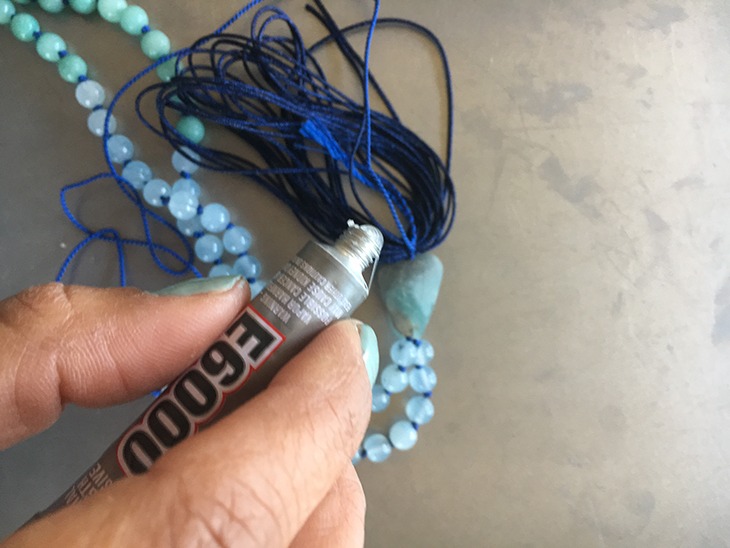
Slide the cord off the card, but hold it securely so it does not unravel. Take the two pieces of string hanging from the guru bead and tie two knots on the inside portion of the tassel. Once secure, take your glue and dab a little on the knots. Allow the glue to dry for approximately 5 minutes. Once the glue is dry, cut the excess string close to the knot.
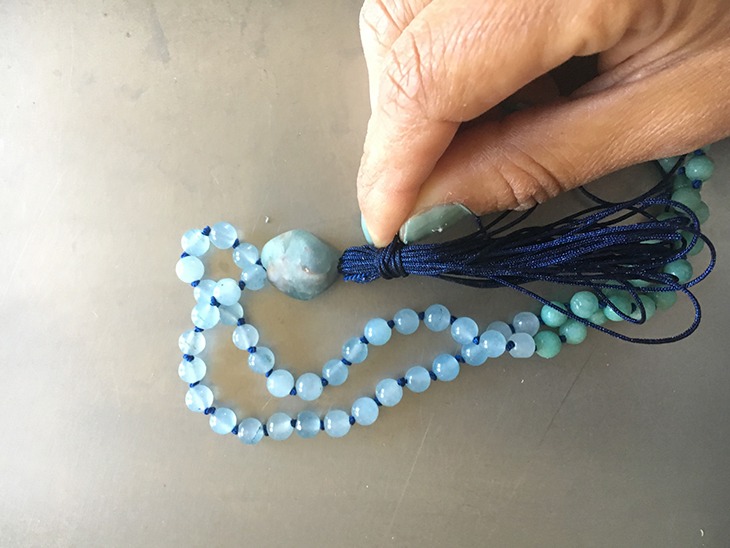
Cut another 8-10-inch piece of yarn or cord and wrap it around the tassel (about half an inch from the top) 5 times. It is wrapped 5 times around the tassel to represent the 5 elements (earth, air, fire, water, ether).
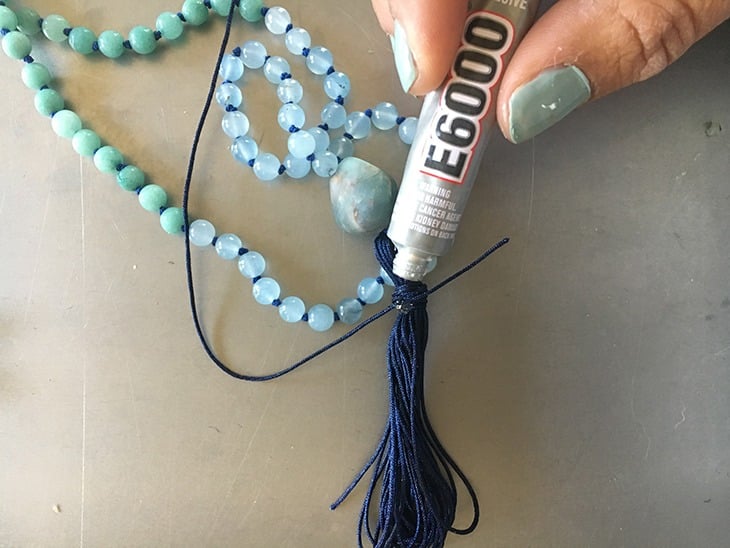
Tie a double knot, then dab a little glue onto the knot. Allow this to dry for 5 minutes. When dry, cut the excess string and smooth it against the existing tassel threads.
Lastly, cut the bottom of the tassel loop and trim the ends so they are even. This is symbolic of letting go and releasing any past energy that is no longer needed.
Note: You can also purchase a pre-made tassel online if you prefer. You can find them at jewelry supply shops or even on Etsy.
Final Step: Don’t Forget to Cleanse + Charge Your New Japa Mala Necklace
It is important to cleanse and positively charge your mala, as many hands have touched the beads, cord, and guru bead. You can do this by lighting palo santo or sage and wafting the smoke around the mala. You can also soak your mala in saltwater or fresh spring water – or place it under the light of a full moon.
To maintain the integrity of your japa mala and ensure it thrives through the years, polish any wood beads with sandalwood oil, clean healing stones with chemical-free soap or coconut oil, and handle it with loving care.
You now have all the tools and instructions you need to make a DIY Japa mala necklace that is uniquely yours and a reflection of your soul! Use your Japa mala for meditation or simply wear it as a reminder of your intention.
This article has been read 9K+ times. Feelin’ the love!
You May Also Enjoy

Setting an intention in yoga is common. An intention (or sankalpa) is defined as a goal you decide on ahead of time. Here’s everything you need to know!
Read »
Don't Miss These


This Month's Letter
From the Editor
Monthly motivation and food for
thought from our founder.