“Knit My Ribs?” 6 Often Confusing Yoga Cues Explained
Yoga teachers can sometimes use some weird jargon during class when they give yoga cues like, “Engage your core” or, “Draw your ribs in.”
This sort of yoga language all has specific purposes to help you find alignment and stability in postures. But, sometimes, these yoga cues can leave you a bit perplexed without further explanation.
Read on to learn what each commonly used yet oftentimes confusing yoga cues mean, along with how to apply them in your body during your practice.
Demystified! 6 Confusing Yoga Cues Explained:
Here’s an overview of some commonly used yoga language and yoga cues, and how to actually make the suggested adjustments within your own body.
1. “Engage Your Core”
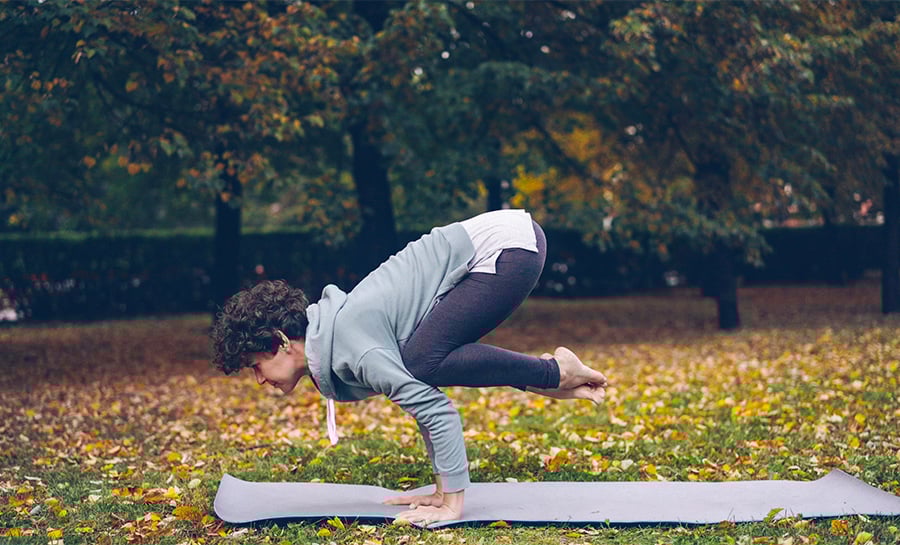
Often when we think of our core, what comes to mind is our belly and the ever-elusive flat stomach. But our core muscles include much more than our front abs. And a flat stomach doesn’t necessarily mean a strong or engaged core.
The core muscles are a complex group of muscles that all work together in both the front and back of your body.
Four different muscles make up your abdominals. The rectus abdominis is responsible for the famous 6-pack, and runs down the front of your body from your ribs to your pelvis.
The internal and external obliques run along the sides of the rectus abdominis diagonally from the pelvis to the ribs. They work together to flex and rotate your torso.
The transverse abdominis is the deepest muscle layer of the abdominal wall and wraps from front to back. It provides stability and support to your organs.
Besides the ab muscles, the latissimus dorsi (lats) and erector spinae also make up the core. The lats are the largest muscle in the torso. They run along your back from your shoulder to your pelvis.
The erector spinae, or paraspinal muscles, are a group of muscles that run along both sides of the spine.
Sometimes the glutes, hip flexors, quadratus lumborum, or others are also included in definitions of the core.
Let’s try engaging the core:
- Stabilize and brace the abdominal, spine, and lat muscles
- Think of pulling everything in slightly and upward
- Activate these muscles without flexing or making them rigid
- You should still be able to breathe normally
- To help identify all these muscle groups, try laughing. Feel everything that engaged and moved? That’s your core
- When you hear this cue, think “activate and stabilize all my core muscles from front to back”
Stop Doing Ineffective Sit-Ups! Use These 7 Yoga Poses to Strengthen and Tone All Parts of Your Core
2. “Find a Neutral Spine”
Teachers use a lot of different yoga cues when it comes to finding a natural position of the spine. Similar cues might be, “Lengthen your tailbone,” “Point your tailbone down,” or “Elongate your spine.”
All spines have curves, and we want to keep these in our yoga practice. A healthy spine looks a bit like an elongated “S” with curves in each of the areas of the spine: sacral, lumbar (lower), thoracic (middle), and cervical (neck).
When you hear cues related to your spine, you want to find healthy alignment of all of these curves.
Let’s try finding a neutral spine:
- To find this alignment, start with your pelvic bone. Most of us have a bit of an anterior tilt (think: duck butt) or posterior tilt (think: grandpa butt). What you want is to find something in the middle
- Neutralize your pelvic bone, and support your desired spinal curves
- To do this, lift your thigh muscles up away from your knees, release any tension in your buttocks, and pull your belly in and up
- From here, move onto your core. Activate your core as discussed above
- Continuing on, roll your shoulders up, around, and back down your spine. Slightly pinch your shoulder blades together and broaden your collar bones
- Lastly, lift through the crown of your head. Think of pulling the tops of your ears up and back to help find the right position for your cervical spine
- When you hear this cue, think “pelvic bone, core, shoulders, head”
Practice This Easy 6-Pose Yoga Sequence for a Happy, Healthy Back
3. “Draw Your Belly/Ribs In”
Ribs are made up of twelve pairs of individual curved flat bones. They attach to your thoracic vertebrae through joint-like connections.
Most connect in the front to the sternum through cartilage. The bottom two ribs are considered “floating” as they connect to your body only at the spine.
Although our rib cage is stable, small movement does happen there to allow for the expansion and contraction of breathing.
In certain yoga postures, such as Warrior I (Virabhadrasana I), our ribs may seem to flare out. A common yoga cue that teachers give to help with this is: “Draw your belly and ribs in.”
But due to the construction of our ribs, there’s not a whole lot of change you can make to your actual rib cage.
Let’s try drawing the belly/ribs in:
- To implement this cue, what’s happening is a combination of engaging your abs, finding a neutral spine, and breathing
- The transverse abdominis is a thin flat muscle that wraps around the torso and runs from your ribs to your pelvic bone. Engaging this muscle will compress the abdomen and feel a bit like putting on a tight corset. This compression will pull in those pesky floating ribs that might be trying to flare out
- Finding a normal pace of breathing will also help the ribs to settle with each exhale
- When you hear this cue, think “activate my core like I put on a corset, neutralize my spine, and breathe”
4. “Lift Your Pelvic Floor”
Ligaments, facia, and three layers of muscle membranes make up the pelvic floor. They create a diamond shaped basin, or hammock, and hold up our internal organs while allowing for movement.
This basin of muscles extends between the sitting bones, the pubic bone, and the tailbone. The pelvic floor expands and contracts in conjunction with our diaphragm when we breathe.
The most important part of using your pelvic floor during yoga is finding it first!
Let’s try lifting your pelvic floor:
- To use these muscles, think about engaging them from all four corners: pubic bone, tailbone, and both sitting bones
- Gently pull them toward the centerline of your body and then lift them up
- When used properly they are stable and working, but not rigid
- A helpful exercise is to act like you are trying to simultaneously stop the flow of urine and gas. Tighten and pull in!
- It can take weeks to finally gain some control over these muscles, so don’t get frustrated if you can’t feel anything at first. This cue is used to help you find stability in the pelvis
- When you hear this cue, think “tighten in from the corners of my pelvis and lift up”
5. “Send Your Breath to ____”
Some teachers will give yoga cues such as, “Send your breath to your right foot” or any other body part that they want you to focus on. But we know that’s not how breathing works.
Air comes into the lungs, the lungs move the oxygen into the heart, and the blood stream sends it through the body. Carbon dioxide is then collected, transported back to the lungs, and leaves the body on the exhale.
Thinking about sending breath to a certain area won’t send any more oxygen to that area. But the power of the mind is amazing.
If we visualize our breath, or prana, going to a specific area of our body, it brings our full attention to that area. This cue invites body awareness and care.
It helps us to identify how part of the body is feeling or working. This cue can help us to breathe intentionally.
Focusing on the breath also has calming effects on the brain and nervous system. It’s a way to turn off the brain chatter that you might be experiencing during class.
Let’s try sending the breath to a body part:
- When you hear this cue, take a deep breath in through your nose
- Then visualize the breath moving through the lungs and spreading throughout your body
What Is Pranayama and What Are the Main Benefits? Here’s Your Quick Guide
6. Stack Your Hips, Shoulders, or Joints
Teachers use this yoga cue to remind us to keep our bodies aligned. Alignment is important to find stability and balance, and to prevent injury.
When stacking parts of your body, it might be helpful to envision a rectangle. Bring your shoulders over your hips, or hips over ankles. If you drew a line between these joints, the shape would be a rectangle.
Keep in mind that our bodies are not perfectly straight or square, so don’t strain anything to find a perfect line.
This cue relates to where your joints are, not where your flesh is. So, when you’re on your back getting ready for Bridge Pose, the meat of your buttocks will spread out a bit. You want to stack your ankles in line with your hip sockets, not where the fleshy part of your butt ends on the mat.
Let’s try stacking your joints:
- When you hear this cue, think “adjust my stance so that my joints are in line with each other”
There You Have It: 6 Common Yoga Cues Explained
Teachers use all sorts of yoga cues and yoga language to help bring our attention back to our body and breath.
Next time you hear these potentially confusing cues, you’ll know how to respond, and you can soak in even more benefits from your yoga practice.
This article has been read 2K+ times. Feelin’ the love!

Don't Miss These


This Month's Letter
From the Editor
Monthly motivation and food for
thought from our founder.